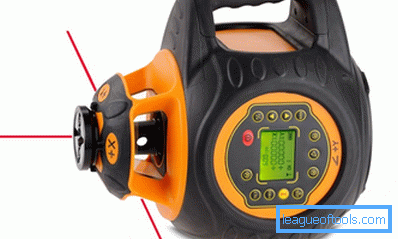
How to repair the laser level do it yourself
In the course of construction work, a nuisance can happen - the necessary tool will break. How to make a repair laser level do it yourself?

The laser level must not be dropped, overloaded or misused.
There are several major problems that sometimes have owners of this type of leveling. It should be prepared to do independent repairs in most cases. Special equipment may be required, which is available only in optical-mechanical workshops. But a non-professional will also cope with simple works.
The first and most common problem is that the device has stopped showing accurate measurements. This device has become popular due to its technical qualities, namely, high-precision readings, which is very important for any repair work. Check their correctness should be every few months.
Why is the laser level inaccurate?

Schemes of location of the axes when checking the level: А-В - schemes of the location of the axes when checking the level; G - the position of the level in the third calibration.
The reason for the repair may be a violation of storage conditions, shaking during transportation. To check the operating status of the device, the readings are estimated by several values:
- vertical line (referred to as y);
- horizontal line (called x);
- plane in a state of inclination.
You can check the horizontal beam in a simple way. This will require a room with a large area. Each wall should be about 20 m. Place a device near one wall, then turn it on. A projection will be displayed on the wall bordering the level. Put a mark on it. It will mark the starting point.
Then, turning the device on 180 °, perform similar actions on the opposite side. This will be a continuation of the beam.
Important! Do not dislodge the tool during operation. Transfer it should be so that all the points that you put before, coincided with the central.
The final label should be on the third wall. It is placed on the same principle as the second. The repair procedure should be repeated 2 times. This way you can eliminate the error and further problems with the tool.

The scheme of the laser level device.
Note the difference between the readings. If it is within the normal range, it means that the device is working properly. Otherwise, repairs will be required. Carefully disassemble the structure. Inside you will find a small antenna. He is responsible for the slope of the head. If an offset occurs during a fall, the level will display inaccurate data. Therefore, it should be corrected. Some masters advise to remove it, arguing that the laser level can be used in any plane.
Similarly, you can check on the vertical line. The only difference is in the position of the device. By turning it 90 °, you will get a projection in a different plane.
If the findings indicate a deviation, you will need to take the measures indicated above.
Back to table of contentsRepair: practical recommendations
You should know that not only the antennae displacement can cause a voiced problem and repair. Its cause may be a failure in the configuration of the cargo. And you can solve it by following these steps:

Diagram of the device optical level.
- Remove the sticker from the case surface. Opening the device, in any case, you lose the warranty.
- Below you will find a screw made of plastic. Opening it, you will see a screw called "A". This is the load. Carefully inspect the platform. You will immediately notice deviations.
- Rotating the screw "A", find the desired position. This can be achieved by hanging a plumb line on the wall.
- Check the position of the horizontal and vertical rays. They should be fine.
- Check frontal roll.
- Finally, in order to adjust the platform, it is necessary to slightly loosen the screw in the middle, and those from the edges should be tightened. This is in order to shift it lower and tilt forward. If you want to raise the platform, then do the opposite. Extreme screws loosen, and the one in the center, tighten. The process requires utmost care.
If the laser level has broken glass, you can replace it yourself.
To do this, purchase the material. Then on its surface make a markup that will correspond to the shape of the spoiled one. Glass should be purchased with a width of about 2.5 mm. Replace when finished.
Back to table of contentsHow to fix button dropping
If buttons are lost at the laser level or they cease to switch, this happens because with regular use they are pressed too hard. You can repair yourself. It is necessary to disassemble the device and solder the detached contact with a special device - a soldering iron.
Tip! In order that the solder does not disappear during further operation, the work is performed using a special solder. The main constituent substance is flux.
The laser level requires a very careful attitude. Therefore, if in the process of use you find defects, you should immediately try to eliminate them. Minor work you can do yourself. But in case of serious damage, contact the experts. If you do not understand anything in this repair, it will be better. Otherwise, you will not only not repair the product, but also worsen it. And buying a new one will cost much more than repairing a service center. In any case, it's up to you. Good luck!