How to cut a ceiling plinth
With the advent of new building materials and technologies, the process of repairing an apartment or a private house has become accepted by many, not as a duty, but as a kind of entertainment. After all, you can try to realize your fantasies and dreams and turn the standard two-room apartment into a cozy tower or a modern office.

Cutting pattern of internal and external corners on the ceiling plinth.
Moreover, it is not necessary to have deep theoretical knowledge or practical skills. The first time, of course, is unlikely to achieve the perfect result. But patience and work will surely help to create an attractive and unique interior. However, it should be remembered that the implementation of almost every operation during the repair has its own subtleties and secrets. To begin, let's try to understand the features of cutting ceiling plinth.
Where to start?
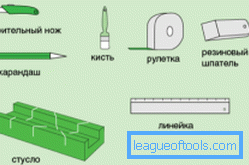
Always start with planning. Before you go to the store, measure the length and width of the room where the baseboard will be glued. And in order for the ceiling plinth to look neat and not attract too much attention, you should stock up on the minimum number of necessary tools and devices for cutting it. What tools in the process will be useful to you? First of all, we need:

Tools for working with ceiling plinth.
- roulette;
- ruler;
- gon;
- hacksaw;
- sharp knife;
- miter box
It is possible that all these tools will not be needed, especially the control and measuring. As a rule, a tape measure replaces both a ruler and a square (with a certain skill). But a newbie is better to be safe and have at hand all of these items.
Back to table of contentsWhat is stouslo?
This question is most often asked by beginners when it comes to organizing a workplace. For the overwhelming majority, the term “miter” does not cause any associations. Meanwhile, we are talking about a simple device, with which you can quickly and efficiently gash the workpiece at a certain angle (30, 45, 60, 90 degrees). This device is also suitable for cutting the ceiling plinth (Fig. 1). As a cutting tool, you can use a hacksaw for metal, a small-toothed carpenter hacksaw or a sharply sharpened knife.
Back to table of contentsWe cut "by eye" and "according to the rules"
Purely theoretically, it is possible to cut the plinth and without any adaptations - "by eye". Experienced masters contrive to qualitatively face the edges of the plinth without a square and a cloth. When viewed from the side it seems that they do it easily and naturally. But it should be remembered that this is the seeming ease, behind which there are years of work and remarkable natural makings. How can we not remember our great-grandfathers, who, without having diplomas and sophisticated devices, built buildings that faithfully served more than one generation.

Figure 1. Making cuts for joining skirting boards using the mash.
In the process of work, you will always have trimming the baseboards, which can be used as a training tool. Be sure to try to connect them “by eye” and make sure that this is a very difficult task, requiring a good eye and spatial imagination.
If you use a staple, the plinth fits seamlessly in the corners of the room. To do this, first we cut each bar at 90 degrees, and then we cut it at 45 degrees. We draw attention to the fact that the baseboard should be pressed against the wide side, not to the base, but to the side wall of the body.
In the course of work, you should be prepared for the fact that the prepared strips of the ceiling plinth will loosely join together after applying them to the attachment points. This is due to the fact that the geometry of the walls in our apartments is far from ideal, and the right angle is in fact not completely straight. In this case, you will have to arm yourself with a sharp knife, be patient and manually adjust the ceiling plinth at the interface.
If the room is designed in such a way that the angles in it are rounded, then the approach to cutting the ceiling plinth will be fundamentally different. Stuslo in this case is not useful. It is necessary to cut 4 to 6 pieces of the plinth 3–5 cm long (the number and length depend on the radius of curvature) and to cut each element, achieving the most dense joining with the wall and the adjacent piece. Of course, the sticking of the corner fragments is carried out in the same sequence as the fitting.
Summing up, I would like to note that cutting the ceiling plinth is quite a feasible task for the vast majority of beginners.
The most important thing is not to rush and observe accuracy in work.