Making clamps do it yourself
A clamp is a tool that is used to tie (clamp, glue, etc.) various planes to each other. But not always a similar tool is at hand. In this case, you can resort to making clamps on your own. The clamp is made quite easily with its own hands, while its design will be quite reliable.

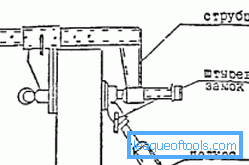
Clamp installation scheme.
Clamp elements
To understand how to make a clamp, you need to know what structural elements it consists of. Among these elements are the following:
- frame;
- clamping jaws;
- moving part;
- lever arm.

Plywood clamp: 1 - body, 2 - round timber from plywood, 3 - steel washer, 4 - clamping screw from steel rod.
The work of such a tightening mechanism occurs through the movement of the movable part on which the thread is located. Thus, the clamping devices are attracted, clamping the necessary elements among themselves. The clamping force is controlled by a lever.
Currently there are other types of clamping devices made in the form of a system of levers. But such lever mechanisms to make on their own at home is quite difficult.
In order to make the clamp reliable and high-quality, it is best to use metal parts, the connection of which can be made by welding. Such fastening mechanisms will have a fairly robust design that will allow tightly clamping together elements with different elasticity coefficients. Moreover, metal ties can be used when performing various kinds of work, since they are a universal tool. They will perform their functions for a long time and efficiently.
Back to table of contentsClamp manufacturing

Knot temporary fixation clamps.
In order to make a clamp, you need to prepare a metal channel. The length of the channel should depend on the maximum thickness of those blanks that need to be tightened. But it is better to choose this size with a small margin so that you can use the finished product in work with other materials.
On the longitudinal center line passing along the channel, marking is required. On these marks there will be holes in which it is necessary to insert a bolt. On the body of the bolt is necessary to attach small pieces of the same channel. This can be done by welding. Also, welding will help cut and holes of the required diameter.
The hole for the bolts is best done in the form of a drop. This will help make the landing nest with a more dense fit. The hole should resemble a keyhole.
Next, a bolt should be welded to a small piece of channel plate. Its head should be of such a size that it can be inserted into the socket. In this preparation of the required emphasis can be considered complete.
Next you need to use a screw with a large diameter. To him must be fixed on one side of the eye. At the other end is attached a long section of the channel. The best mounting option will be welding. After that, you can start using clamps.
Back to table of contentsApply flexible insert
Very often, when working, it is necessary to tie parts with a large plane / surface. In this case, you must use flexible inserts. To make it, you need to use a fairly rigid material, the surface of which will have a slight bend. As such material, you can use a conventional metal plate with a thickness of 3-4 mm.
The ends of this insert must be pressed from 2 sides using clamps to the bonding plates. In this case, the insert must be positioned so that its surface performs a uniform pressure on the entire plane of the surface being processed.
The use of a flexible insert in a pair with clamps will allow reliable bonding of various surfaces, even with a very large plane.
Its application will greatly simplify the entire process of work.
There are still quite a few ways in which you can make clamps on your own. But this production version is the most versatile. Such a clamp will allow you to conveniently use it while working with parts that have large dimensions (doors, worktops, etc.).